Setup Guide
Turn on Foreseer
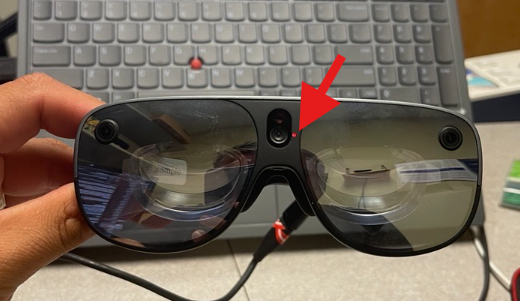
- Press the power button or connect the USB-C cable from PC to the glasses to wake up the glasses. A red light blinking next to the center camera indicates the glasses are turned on. The device is also briefly showing a split Snapdragon logo while booting.
Troubleshooting
- Check the battery kill switch and make sure it is set to ON.
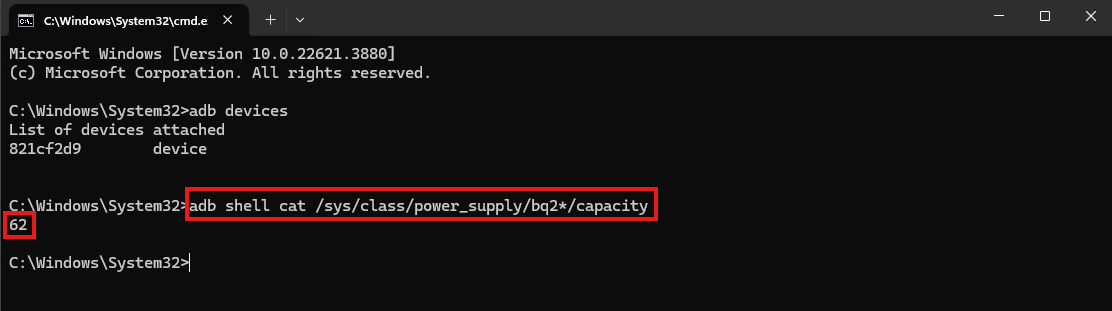
- Check the battery level with adb:
adb shell cat /sys/class/power_supply/bq2*/capacity- If it is bellow 30% charge the device via USB-C cable until reaches above 65%. The battery kill switch must be set to ON, otherwise the glasses will not charge.
Connecting Glasses and Phone
Foreseer and Lanai connect via a wifi hotspot on the phone. The following steps walk through the connection process.
- Open the Settings App on the smartphone.
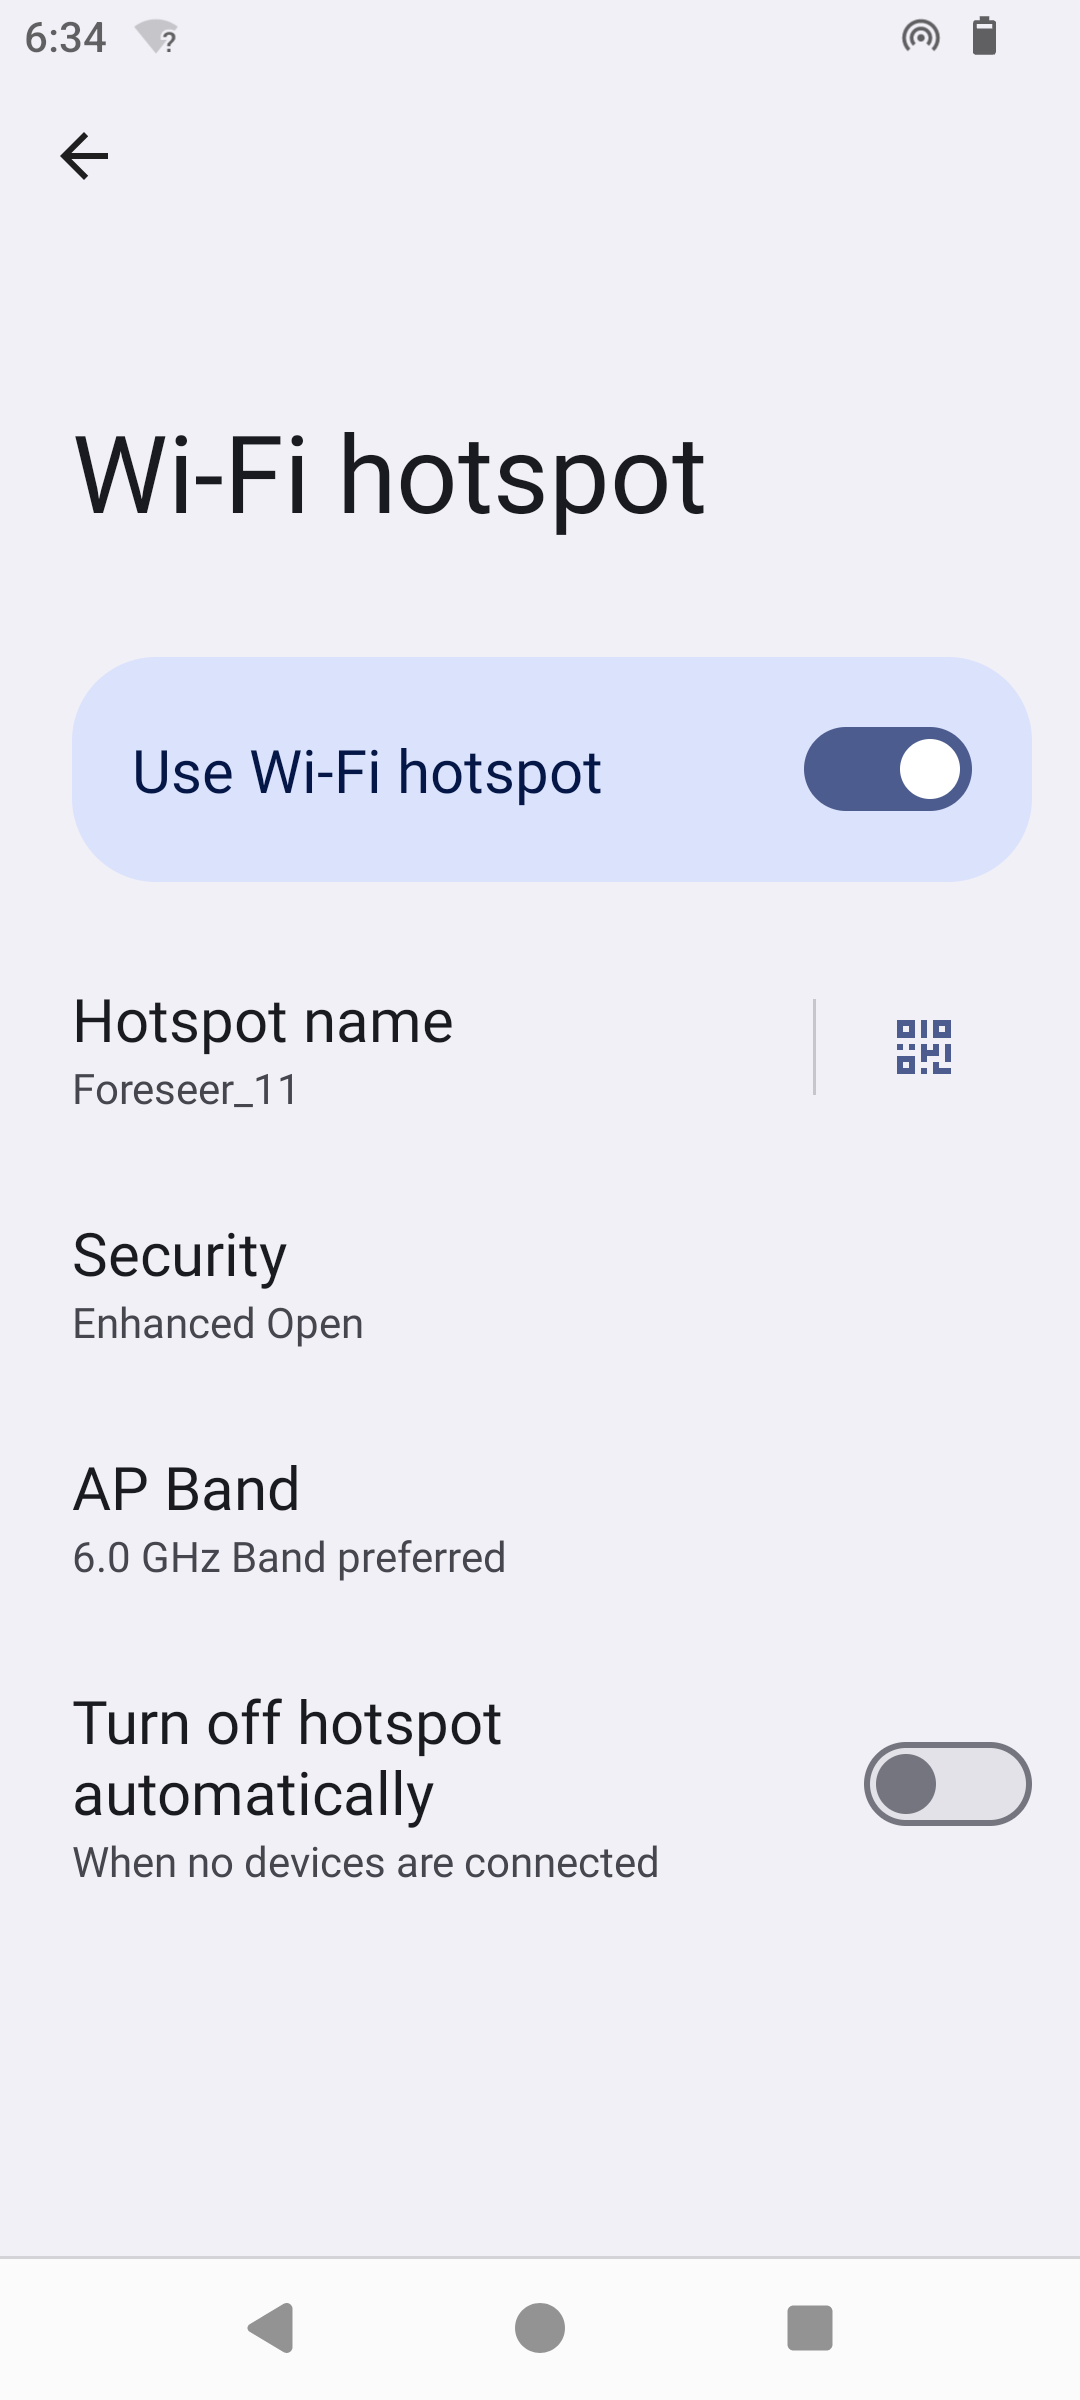
- Go to Settings > Mobile, Wi-Fi, hotspot > Hotspot & tethering > Wi-Fi hotspot
- Set security to Enhanced Open
- Set AP Band to 6GHz Band preferred
- Turn off Turn off hotspot automatically
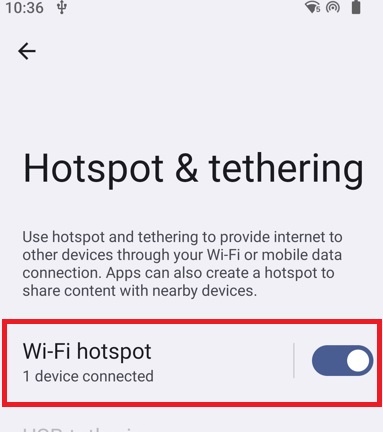
- Go back to Settings > Mobile, Wi-Fi, hotspot > Hotspot & tethering and check for number of devices connected under Wi-Fi hotspot.
- 0 Devices: No glasses are connected - continue the setup.
- 1 Device: Glasses got automatically connected. Try using the Snapdragon Spaces Sample apps to check if everything is working correctly.
Troubleshooting
Reboot Foreseer
There are several problems that can occur using Foreseer glasses:
- No visual in glasses
- App not starting as XR (The phone screen shows content that's supposed to be rendered in the glasses)
They may be resolved with a simple reboot procedure:
- Reboot the glasses using
adb reboot. - Wait for the glasses to reconnect by checking if a device is connected to the hotspot on the phone
- Launch the app again and see if that resolves the issue
Reboot Lanai
For issues such as:
- Snapdragon Spaces Services crashing
- Two devices connected to hotspot (even though there's fore sure only one device connected)
They may be resolved with a simple reboot procedure of the phone and the glasses:
- Reboot the device using
adb reboot. - Turn on the hotspot on the phone
- Wait for the glasses to reconnect by checking if a device is connected to the hotspot
- Launch the app again and see if that resolves the issue
Advanced Setup
Display the Hotspot Name
The name of the Wi-Fi hotspot that started on the phone that the glasses connect to can be changed in a config file on the glasses. If the hotspot name doesn't match the config file, the glasses will not connect anymore.
Display the device's Wi-Fi configuration via adb:
adb rootadb shell cat /data/misc/wifi/wpa_supplicant.conf- the line ssid="[hotspot name]" shows the name of the hotspot
Modifying the Hotspot Name
Modify the device's Wi-Fi configuration via adb by pulling the file, modifying it, and pushing it back to the glasses:
adb rootadb pull /data/misc/wifi/wpa_supplicant.conf- The file has downloaded from the device and can now be changed locally. Open it and change the line ssid="[hotspot name]" to the preferred hotspot name
adb push wpa_supplicant.conf /data/misc/wifi/adb reboot
Useful adb Commands
A collection of adb instructions for Snapdragon Spaces and some adb commands can be found at the Snapdragon Spaces FAQ page How to use adb with Snapdragon Spaces Devkits.