Unreal Engine Setup Guide
This guide will explain in detail how to get started with the Snapdragon Spaces SDK in Unreal Engine for virtual and mixed reality projects. To learn how to get started for augmented reality projects, go to the AR Setup Guide.
Prerequisites
Please note that the Snapdragon Spaces SDK currently supports the Unreal Engine Editor versions 4.27 and 5.3.
Only Windows Win64 is supported as a development platform due to a limitation of the OpenXR plugin. The plugin does not support Unreal Engine 5.4 or higher.
Android Build Support must be added when installing the Unreal Engine to be able to export .apk files. Please follow the Unreal instructions for setting up Android SDK and NDK.
Step 1: Create a Project
To create a new Unreal Engine project, follow the steps in the Setting Up a Blank Project article of the Unreal documentation for AR projects.
The Adding a Pawn and Game Mode and Creating an AR Session sections can be ignored if importing the samples isn't needed.
Step 2: Import the Plugin
To import the Snapdragon Spaces plugin into the engine, simply extract the SnapdragonSpaces folder from SnapdragonSpaces_Plugin archive to the Engine/Plugins/Marketplace folder in the engine installation path.
If the Marketplace folder isn't created in the Engine, it can be created inside the Plugins folder, and then copied to the SnapdragonSpaces folder. Please note that Unreal only detects the plugin if the suggested path is respected.
Directly importing the plugin into the project is not recommended. However, if it is necessary, please ensure that the temporary or intermediate files are cleaned each time the SDK is upgraded to prevent compilation errors.
Step 3: Import the Samples
To import the Snapdragon Spaces Samples into the project, open the SnapdragonSpaces_Samples zip file and copy the Config folder to the root of the project overwriting the existing files, then copy the SnapdragonSpacesSamples plugin, located in the Plugins folder of the project folder, into the Plugins folder (if the Plugins folder in the project does not exist, go ahead and create it). Note that the SnapdragonSpacesSamples plugin needs the Snapdragon Spaces Plugin. Before adding the samples plugin, ensure that the Snapdragon Spaces Plugin is already added in the project.
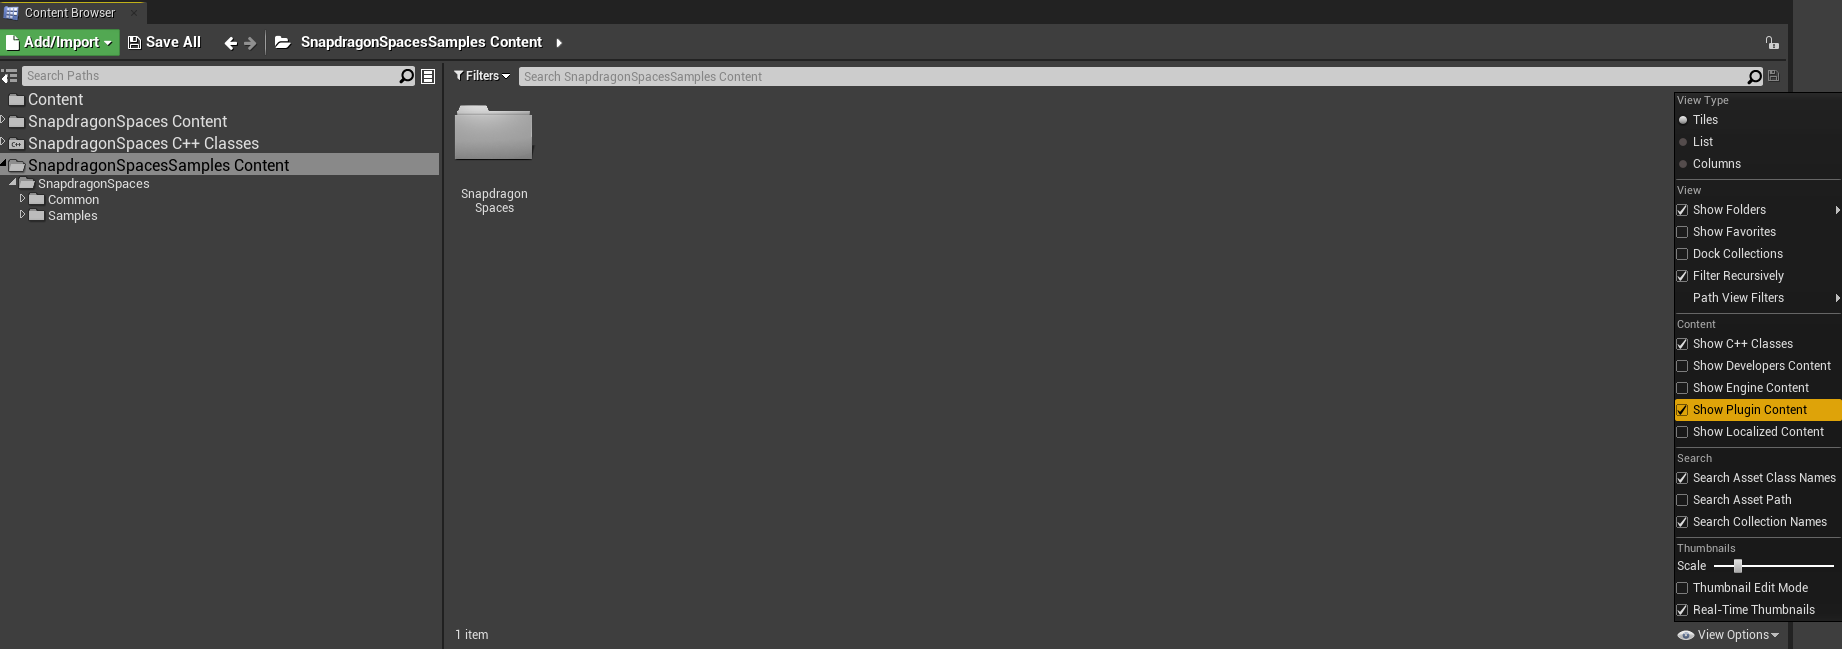
Content sub-folders include folders for the samples, along with a common folder. The common folder includes the base blueprints for using the AR devices correctly.
In order to access the Snapdragon Spaces Samples content, please activate the visibility of the project plugins in the editor.
Step 4: Enable the Plugin
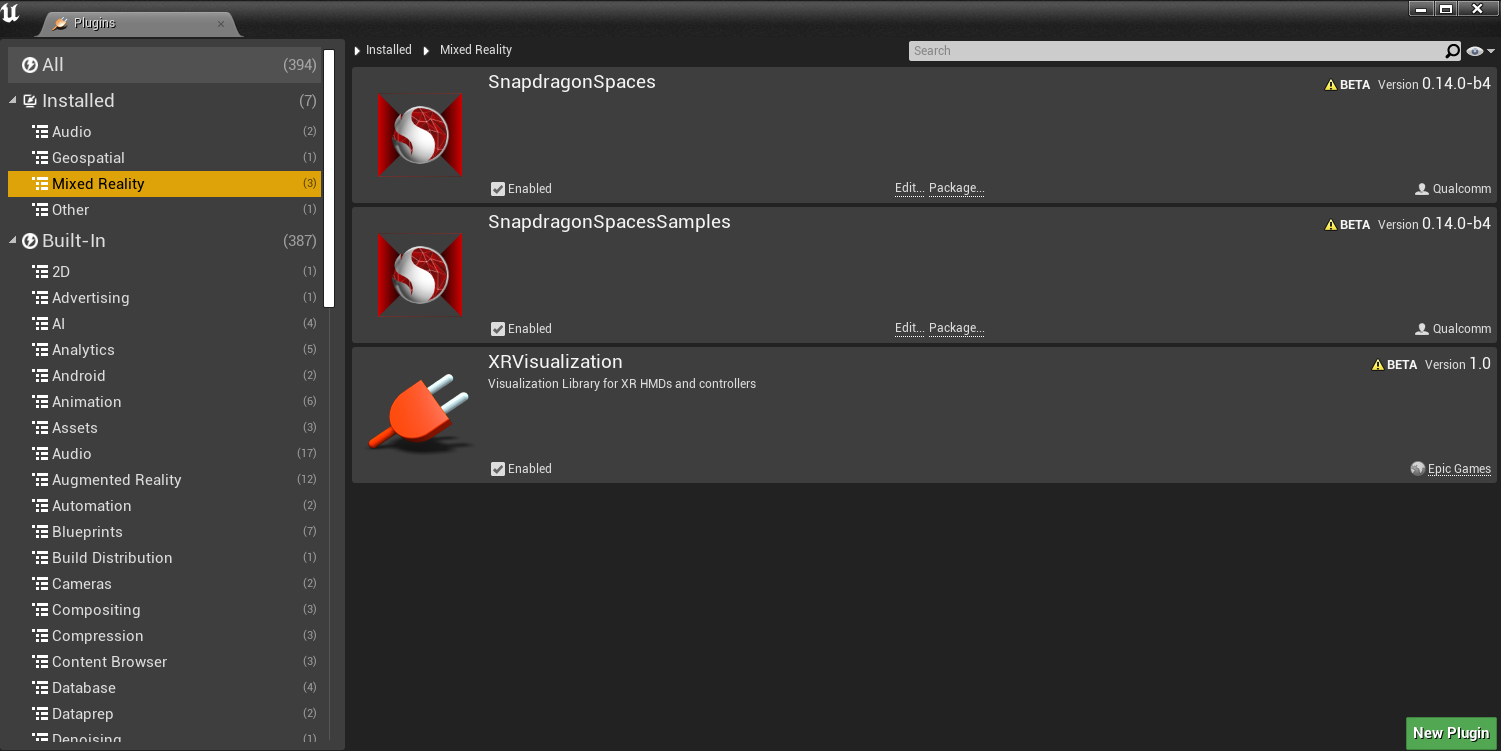
To enable the Snapdragon Spaces OpenXR plugin, navigate to the project settings under Edit > Plugins > Mixed Reality and enable the SnapdragonSpaces plugin.
Under Edit > Plugins > Virtual Reality, check if the OpenXR plugin is enabled as well.
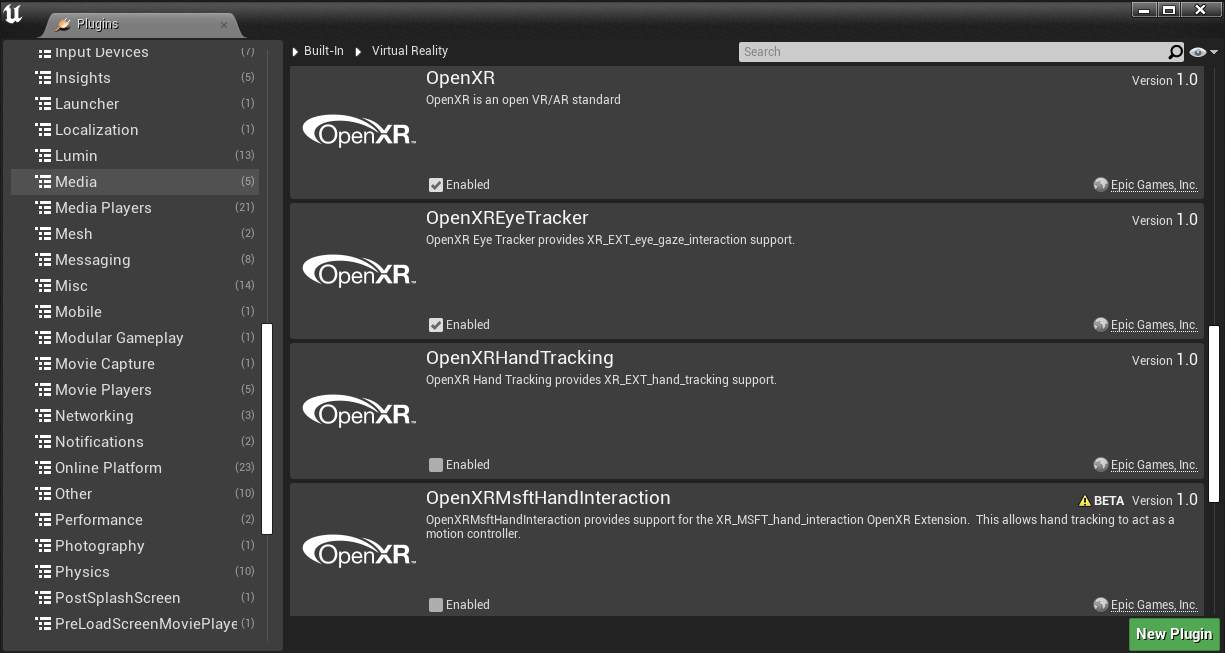
Make sure the OpenXRHandTracking plugin is disabled. It can cause conflicts with Snapdragon Spaces' features.
Step 5: Change the Project Settings
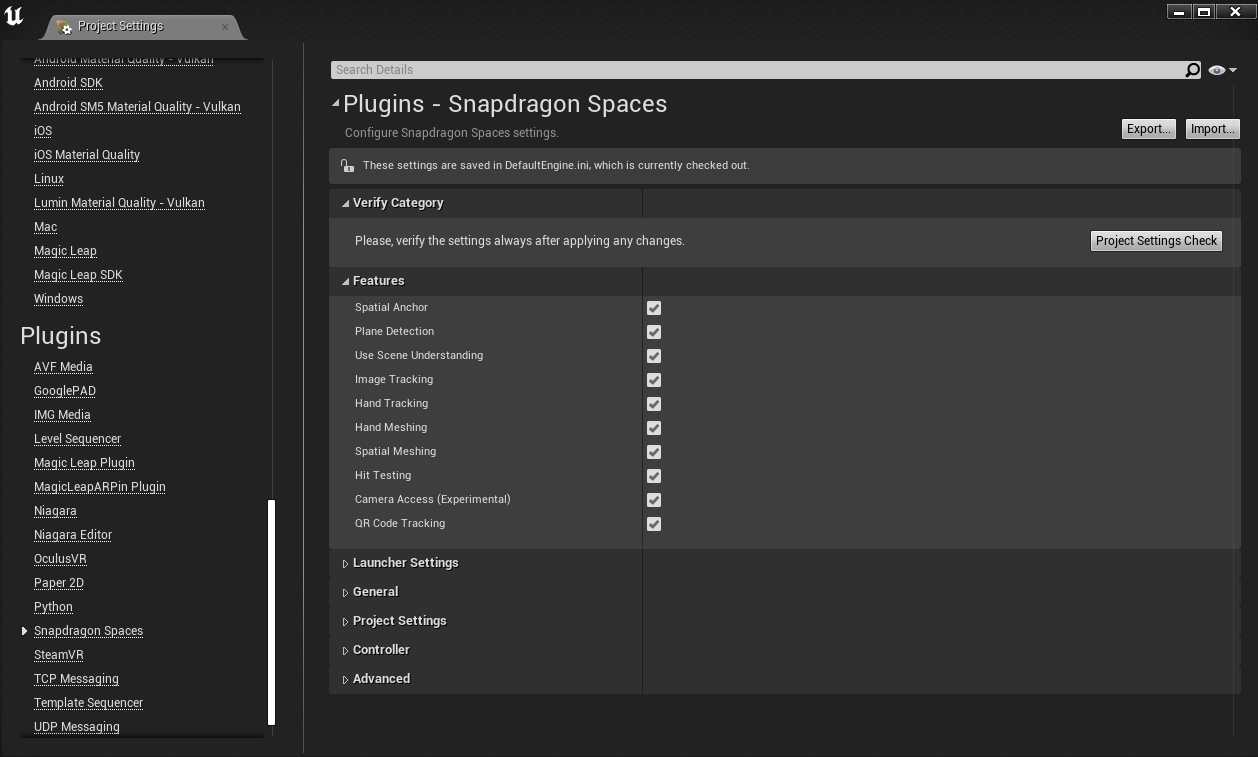
After activating the plugin, the Snapdragon Spaces SDK section will be available under Edit > Project Settings > Plugins > Snapdragon Spaces.
Verify Category
After updating the setting options, it is advisable to check that the settings comply with the Snapdragon Spaces SDK rules. Should any errors or warnings arise, will be displayed in the appropriate section.
Features
Developers have the option to customize the features included in the final package by enabling or disabling them based on their needs.
- Spatial Anchors
- Plane Detection
- If Use Scene Understanding option is enabled, the feature will use the same technology as
Scene Understandingto detect planes.
- If Use Scene Understanding option is enabled, the feature will use the same technology as
- Image Tracking
- Hand Tracking
- Spatial Meshing
- Hit Testing
- Camera Frame Access
- QR Code Tracking
Launcher Settings
This section is used to add data to the Android Manifest, which may then be consumed by Snapdragon Spaces enabled hardware and software to retrieve requirements for the application. The current features that can be declared as required and/or supported are Hand Tracking, Passthrough, Controllers, and Room Scale. If the uses-feature tag is present, but the required attribute is set to false, it means that the application is capable of using the feature but doesn't require it to function properly. For more information on this topic, please refer to the Android documentation.
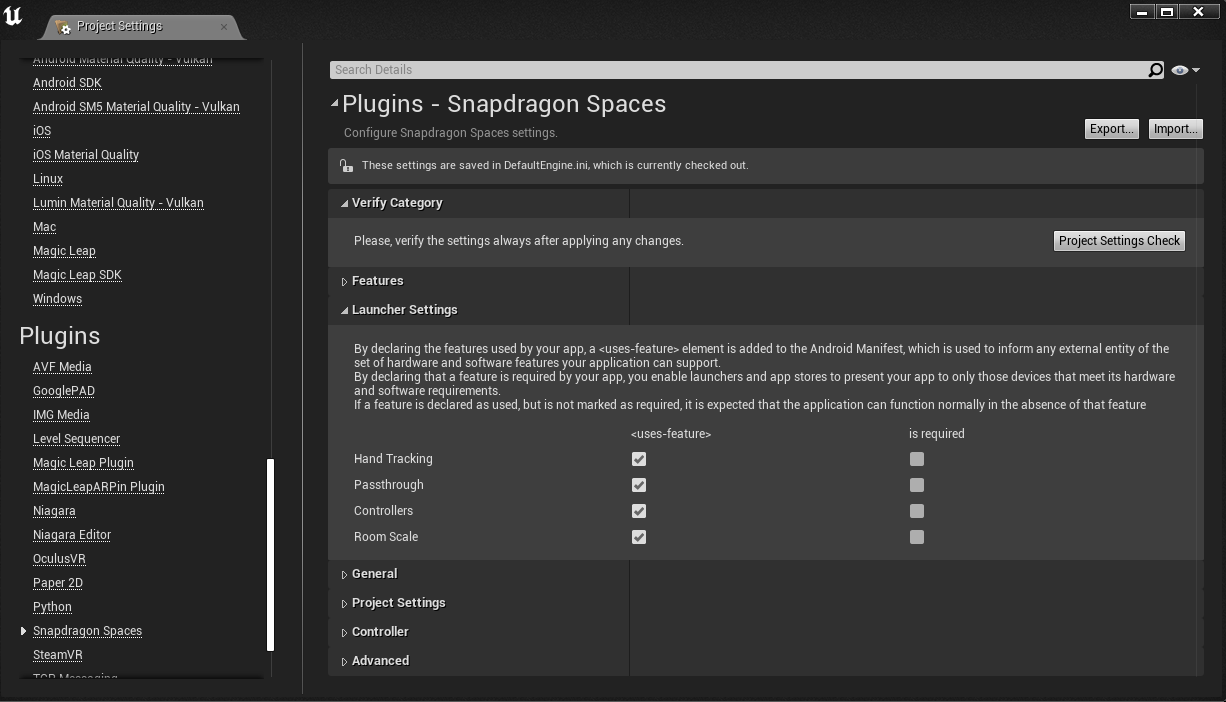
By default, all the uses-feature values are set to true, if the application does not use any of the features, ensure those features are set to false.
After applying changes in this section, validate the settings by clicking the Project Settings Check button in the header. Setting any of these options as is required requires having the corresponding feature enabled in the Features section. Otherwise, compilation will fail.
Any errors or warnings will be displayed in the header as well.
General Settings
This section is used to update the data in the Android Manifest to control how the Android activity is launched on the device.
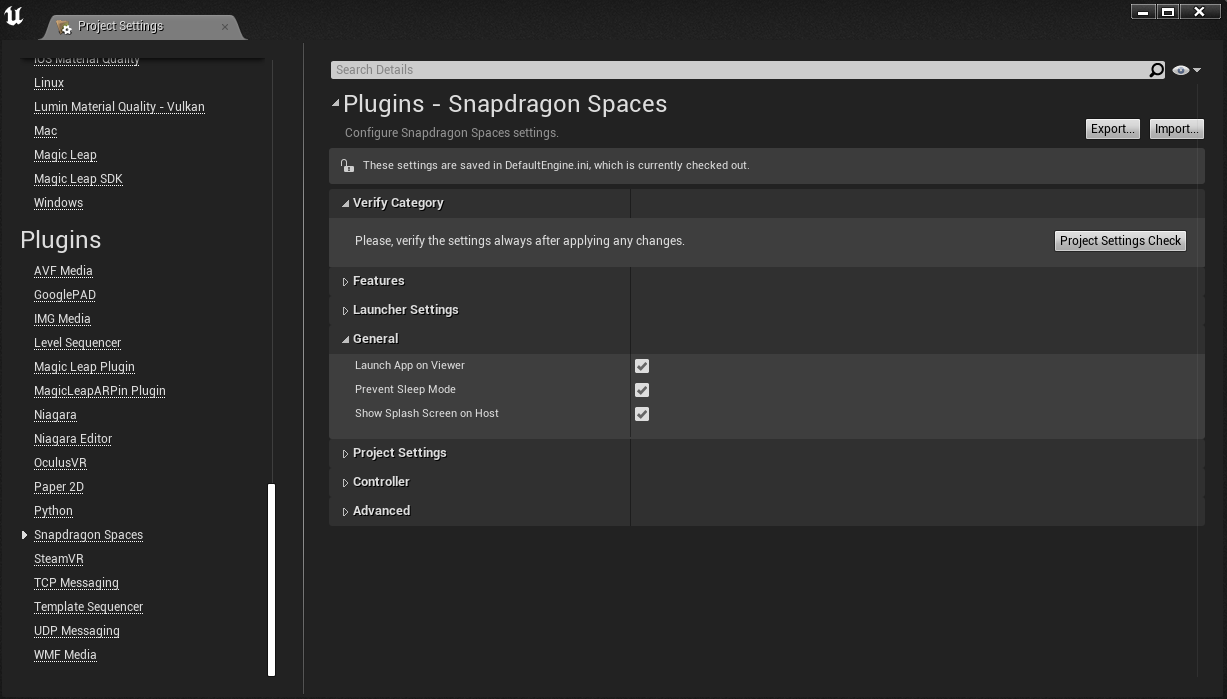
- Launch App on Viewer: Launch app on viewer device by default. If false, adds a property in the Android Manifest to skip app on viewer.
- Prevent Sleep mode: Doesn't modify the Android Manifest directly. Instead, updates the application settings upon launch to prevent the device from entering sleep mode while the app is running.
- Show Splash Screen on Host: Adds a property in the Android Manifest to display the splash screen on the host device.
Project Settings
This section is used to verify that the settings are aligned with the requirements for a Snapdragon Spaces XR project.
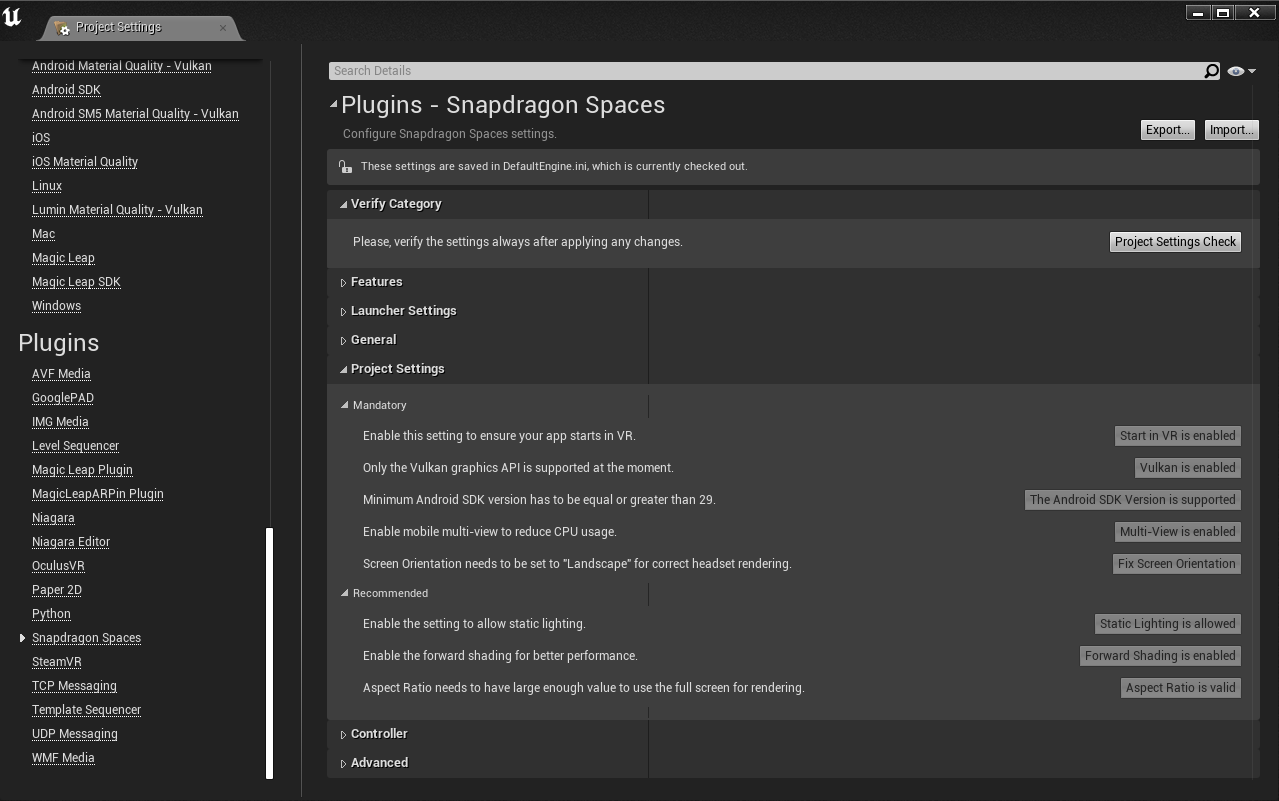
Required Settings
- Start in VR: Should the game attempt to start in VR.
- Supports Vulkan: Only the Vulkan graphics API is supported at the moment.
- Minimum Android SDK Version: What OS version the app is allowed to be installed on (has to be equal or greater than 29).
- Mobile Multi-view: Enable single-pass stereoscopic rendering on mobile platforms to reduce the CPU usage.
- Screen orientation: Only the
Landscapeorientation of the application is allowed for correct headset rendering.
Recommended Settings
- Allow Static Lighting: Whether to allow any static lighting to be generated and used, like lightmaps and shadowmaps. Dynamic lighting is not recommended for a mobile package.
- Forward Shading: Supports MSAA and has lower default cost improving the performance, but fewer features supported overall. Materials have to opt-in to more expensive features like high quality reflections.
- Maximum Supported Aspect Ratio: Maximum supported aspect ratio (width/height) needs to have large enough value to use the full screen of rendering on viewer.
Step 6: Adding XR Controllers for Spaces VR Projects
This step is not required for augmented reality projects that are designed to be incompatible with virtual or mixed reality devices.
To configure the input setting, navigate to the project settings under Edit > Project Settings > Engine > Input. Next, add the XR Controller (L) Thumbstick X and the XR Controller (L) Thumbstick Y to manage the left controller, and the XR Controller (R) Thumbstick X and the XR Controller (R) Thumbstick Y to manage the right one. Feel free to register these actions with any naming convention.
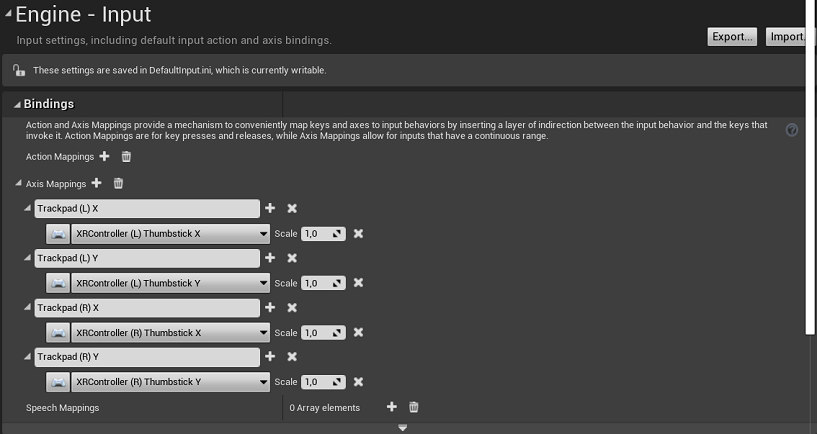
Another option is to add the following lines to the Config > DefaultInput.ini file:
+AxisMappings=(AxisName="Trackpad (L) X",Scale=1.000000,Key=SnapdragonSpacesXRController_Left_Thumbstick_X)
+AxisMappings=(AxisName="Trackpad (L) Y",Scale=1.000000,Key=SnapdragonSpacesXRController_Left_Thumbstick_Y)
+AxisMappings=(AxisName="Trackpad (R) X",Scale=1.000000,Key=SnapdragonSpacesXRController_Right_Thumbstick_X)
+AxisMappings=(AxisName="Trackpad (R) Y",Scale=1.000000,Key=SnapdragonSpacesXRController_Right_Thumbstick_Y)
Optional: Adding a New Interaction Profile
To use and create a new interaction profile instead of the ones included in the Snapdragon Spaces plug-in, create a new class. This class can inherit from IModuleInterface and IOpenXRExtensionPlugin interfaces and implement the functions StartupModule, ShutdownModule, GetDisplayName and GetInteractionProfile. In StartupModule the necessary keys must be created and in GetInteractionProfile the intended interaction profile must be configured. See how it is done in the FSpacesInputExtension class. Make sure that this new module is loaded in the PostConfigInit loading phase. Finally, the desired action and axis mappings can be created with the keys created in the previous class and use the inputs in the project.