Dual Render Fusion Setup Guide
This guide will explain in detail how to get started with the Snapdragon Spaces SDK in Unity to enable Dual Render Fusion.
Prerequisites
Please note that the recommended Unity Editor version to work with Snapdragon Spaces is 2022.3 LTS (starting with 2022.3.16f1). Later versions of the Unity Editor have not been extensively tested and may not work as effectively.
The Android Build Support module must be added when installing the Unity Editor to be able to export .apk files. The module can also be added afterward through the Unity Hub.
This guide assumes you have a Snapdragon Spaces project which has been configured according to the initial steps laid out in the Unity Setup Guide.
Information about migrating a project using an older version of Dual Render Fusion to the latest integrated version of the feature can be found in the Dual Render Fusion Migration Guide.
Import the Samples
The Snapdragon Spaces SDK package comes with additional sample assets to showcase how to use Dual Render Fusion.
To import them, simply pick the package in the package manager (located in the menu bar under Window > Package Manager) and click import on the Fusion Samples.

Once imported, the following scenes are available to showcase different aspects of the Dual Render Fusion feature:
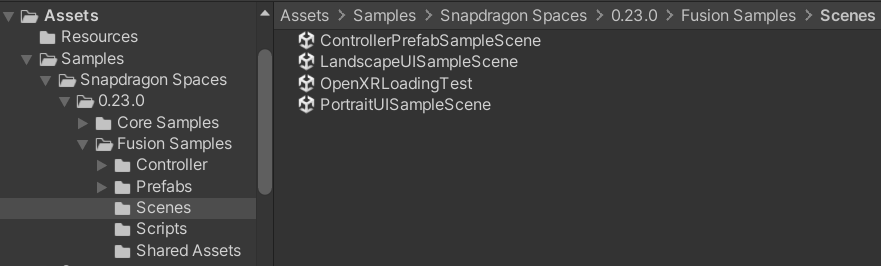
Controller Prefab Sample Scene - a sample scene used for adapting the Android Companion Controller for Snapdragon Spaces into a Unity Prefab, with full control over the Settings and Exit button. See Companion Controller for more details.
LandscapeUISampleScene - a simple scene with a Landscape Canvas containing interactable Canvas UI elements to manipulate a cube.
OpenXRLoadingTest - a scene demonstrating allowing an app to start up immediately on the smartphone and then enabling OpenXR upon establishing a connection with the glasses. See Dynamic OpenXR Loader below for more details.
PortraitUISampleScene - a simple scene with a Portrait Canvas containing interactable Canvas UI elements.
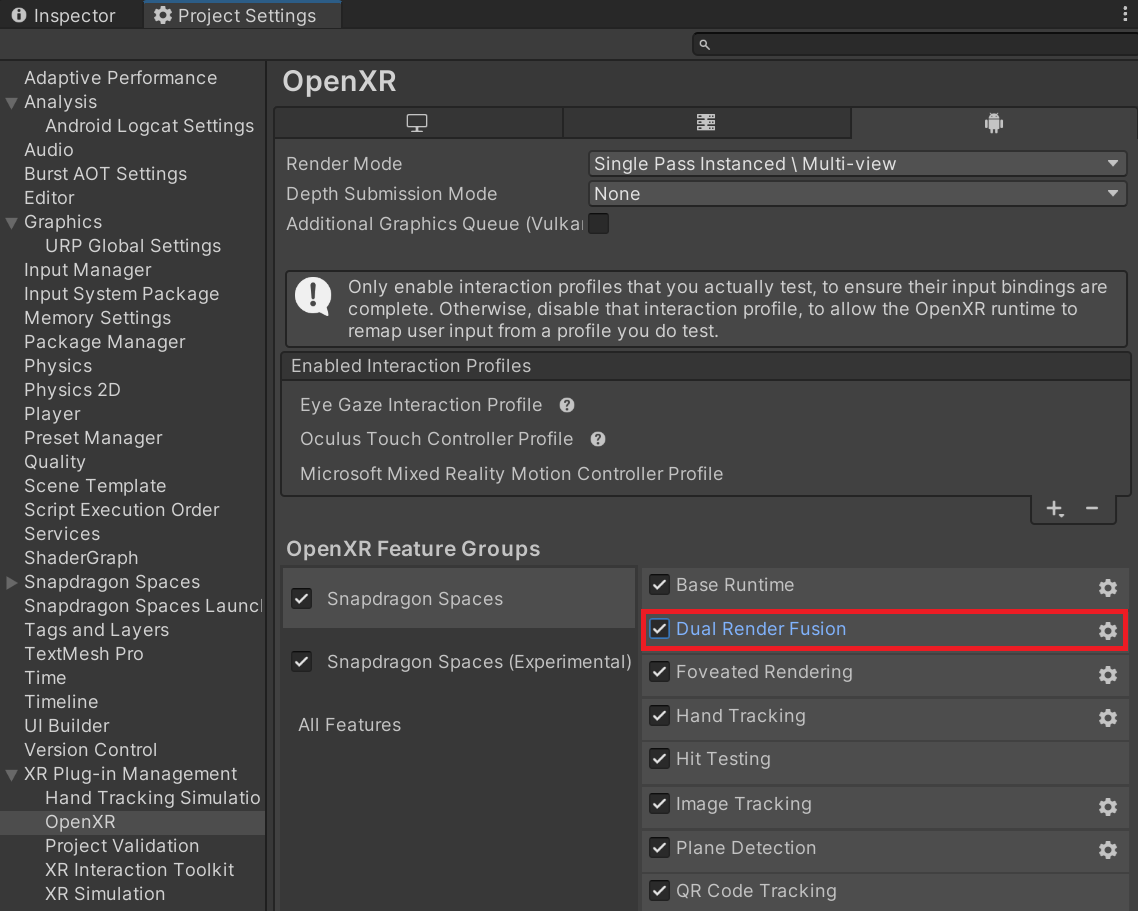
Enable the Dual Render Fusion feature
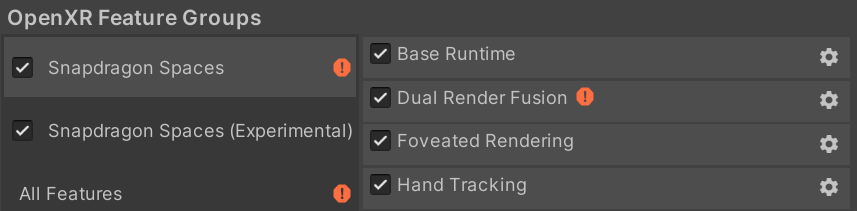
Navigate to Project Settings > XR Plug-in Management > OpenXR (> Android Tab) and enable the Dual Render Fusion feature.
Change the project settings
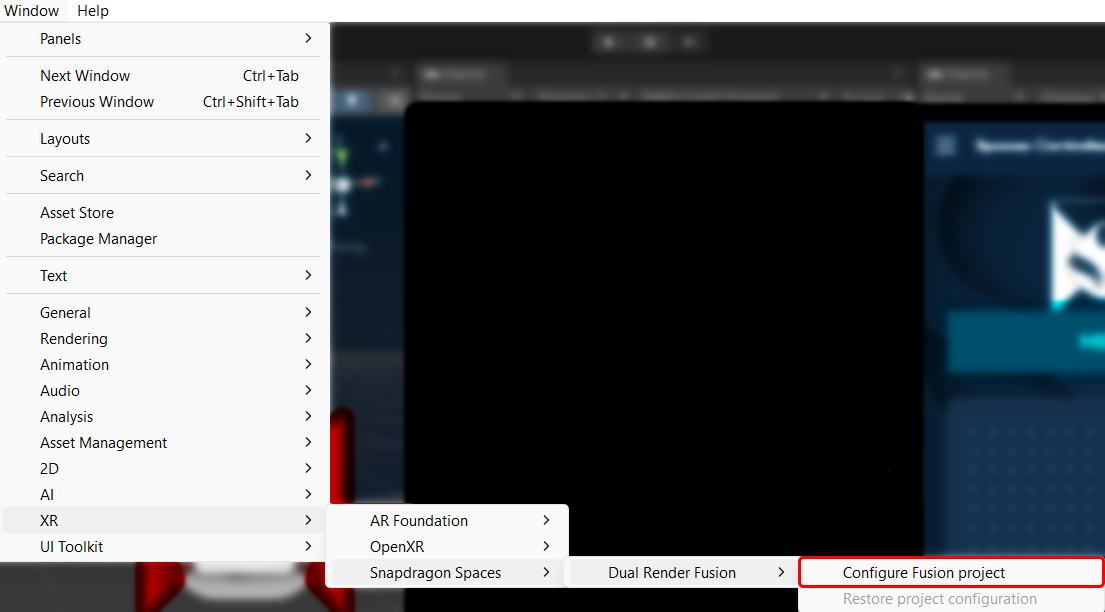
Using the menu item Window > XR > Snapdragon Spaces > Dual Render Fusion > Configure Fusion project is the easiest way to configure the project settings for use with Fusion.
This will adjust the project settings as follows:
Disable Initialize XR on Startup under
Project Settings > XR Plug-In Management > (Android settings tab).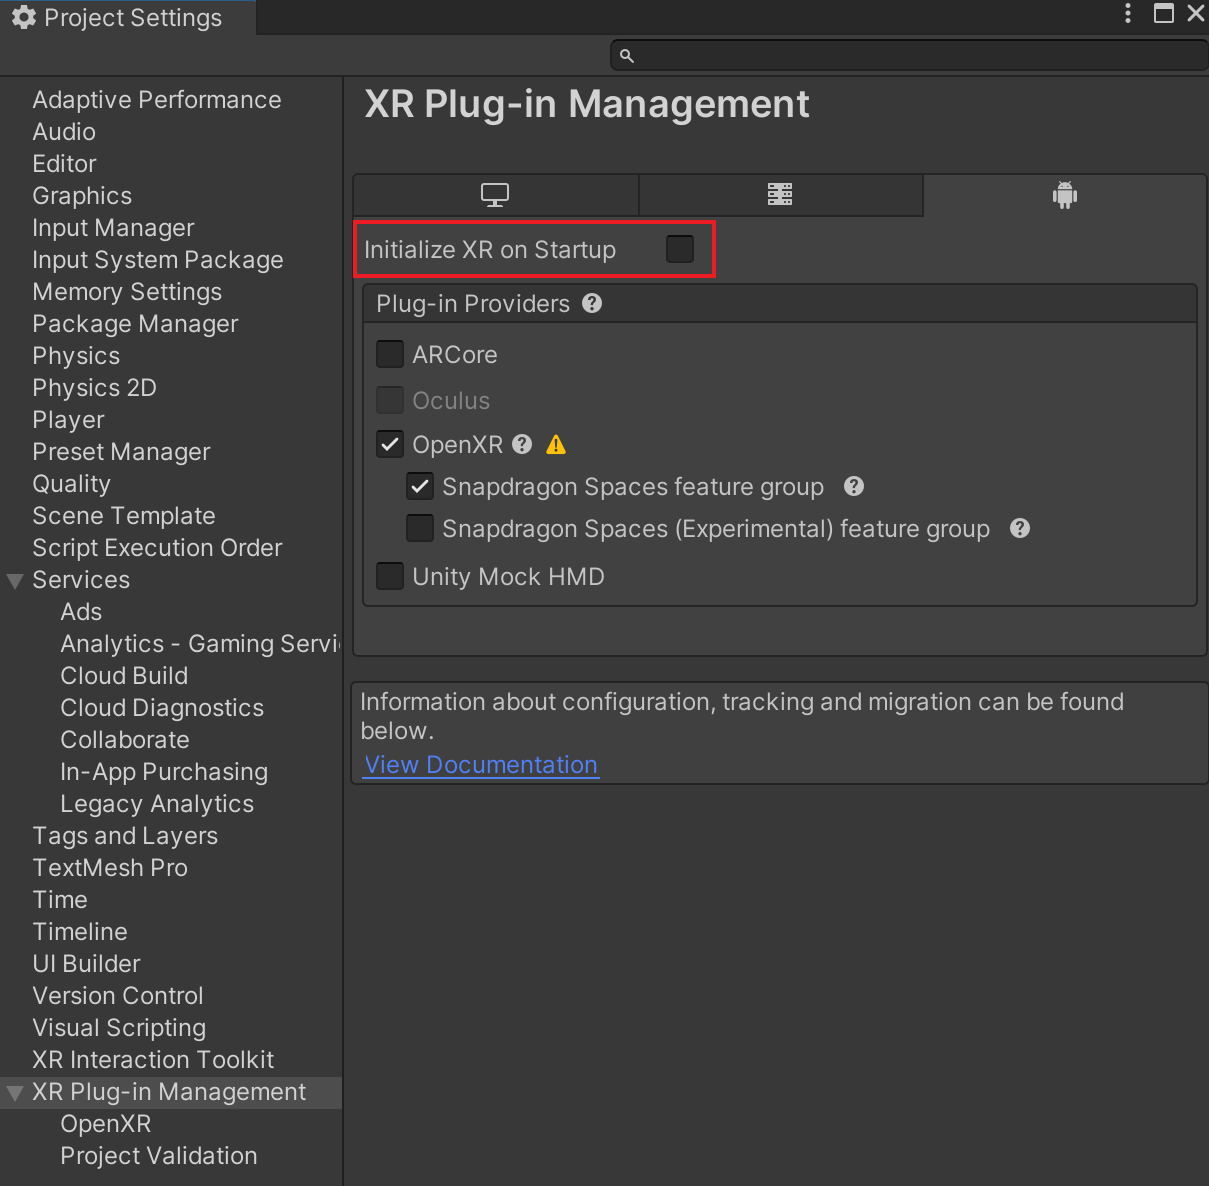
Under
Project Settings > XR Plug-In Management > OpenXR > Base Runtime feature settings (gear icon):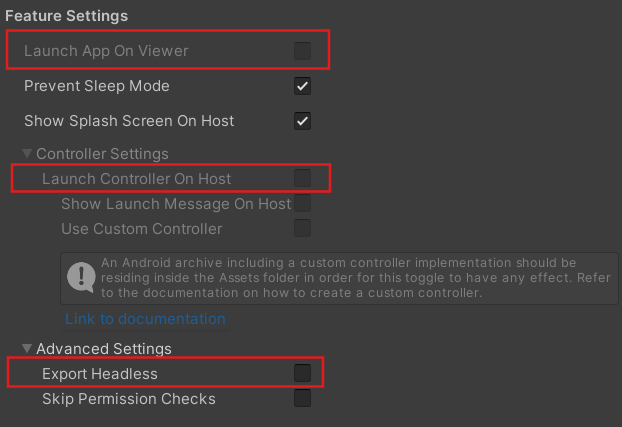
- Disable Launch App On Viewer.
- Disable Launch Controller on Host.
- Disable Export Headless.
Sets the Active Input Handling value under
Project Settings > Player > Other Settings > Configurationto both. This allows use of the new Input System package in parallel with the legacy Input System.
The Active Input Handling change is highly recommended for most use cases.
All other changes are required for Dual Render Fusion to function correctly.
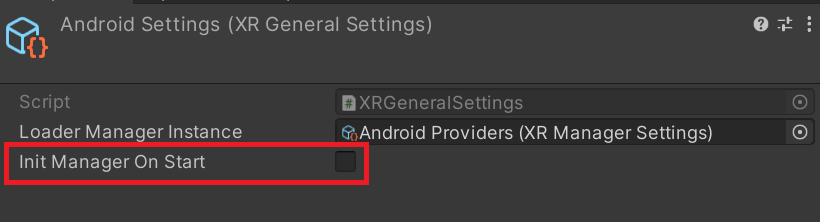
If these settings need to be (re)applied manually, and the Initialize XR on Startup checkbox cannot be disabled, navigate to Assets > XR > XRGeneralSettings > Android Settings.
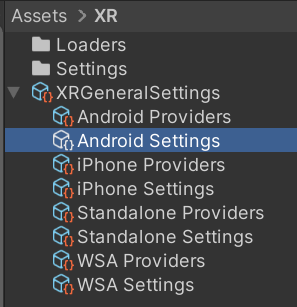
Here, disable Init Manager On Start.
Apply Project Validator Fixes
Navigate to Project Settings > XR Plug-in Management > OpenXR > (Android Settings tab) and find the Dual Render Fusion feature.
Click on the gear icon to open the feature settings.

Enable Validate Open Scene to run project validators for the current scene.

Disable Validate Open Scene when done with this step.
Leaving the setting enabled can cause problems in automated build environments. See Configure Dual Render Fusion Settings for further details.
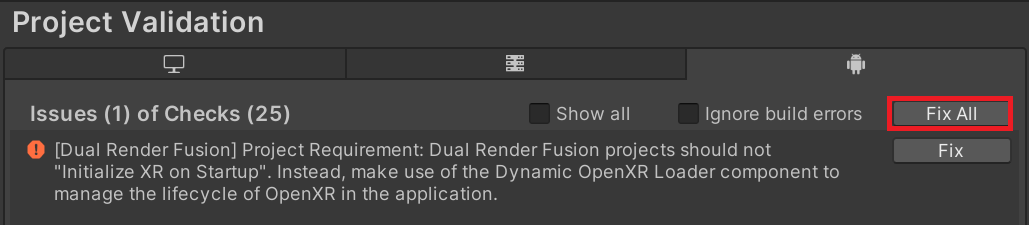
Click on the red exclamation point next to Dual Render Fusion to open the Project Validation window.
The Project Validation window will show several Fix options for updating both the Unity Project and the currently open scene, so ensure that the correct scene is open in the project. These issues may vary depending on your scene setup and project settings.
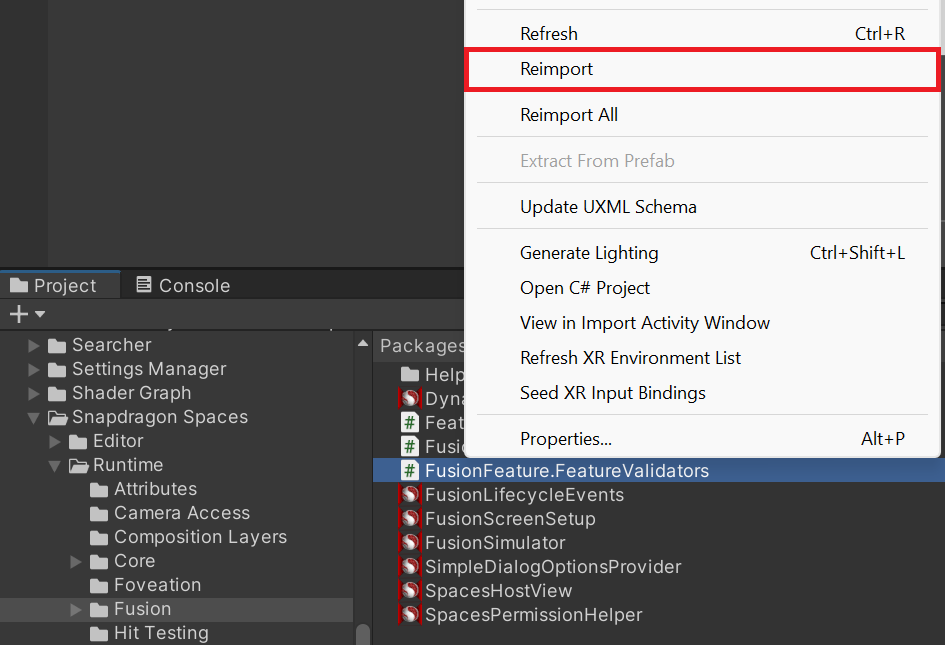
Dual Render Fusion should automatically populate these options. If the Dual Render Fusion feature is showing an exclamation mark but no related options appear, reimport the script Packages > Snapdragon Spaces > Runtime > Fusion > FusionFeature.FeatureValidators to fully re-process the project validation files.
At this point, Dual Render Fusion should be properly enabled for launching.
For a new project, the scene hierarchy should now contain additional game objects:
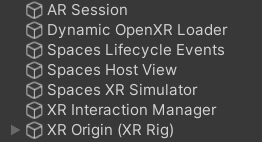
Additional information about these game objects and the attached components can be found on the Components page.
For developers with an existing Snapdragon Spaces project who want to transition to using Dual Render Fusion, see the Companion Controller section for an easy way to get started without changing the functionality of the application.
Configure Dual Render Fusion Settings
Available settings for the Dual Render Fusion feature include:
- Validate Open Scene - when this setting is enabled, the Project Validation window will check if the current scene is configured correctly to work with Dual Render Fusion. Disable this setting if the project's build system doesn't have a full-feature scene (like an additive scene) to avoid build blockers.
- Ignore OpenXR Version - when this setting is enabled, the Project Validation window will allow the use of any OpenXR plugin version. For versions higher than 1.11.0 this may cause rendering issues. The recommended version for Snapdragon Spaces is 1.10.0.